How to Measure for Made to Measure Internal Doors

Measuring for made to measure internal doors demands more than recording one width and one height. Every opening has a story. Plaster may bulge near one corner. Floor coverings may add several millimetres. Older walls rarely behave perfectly.

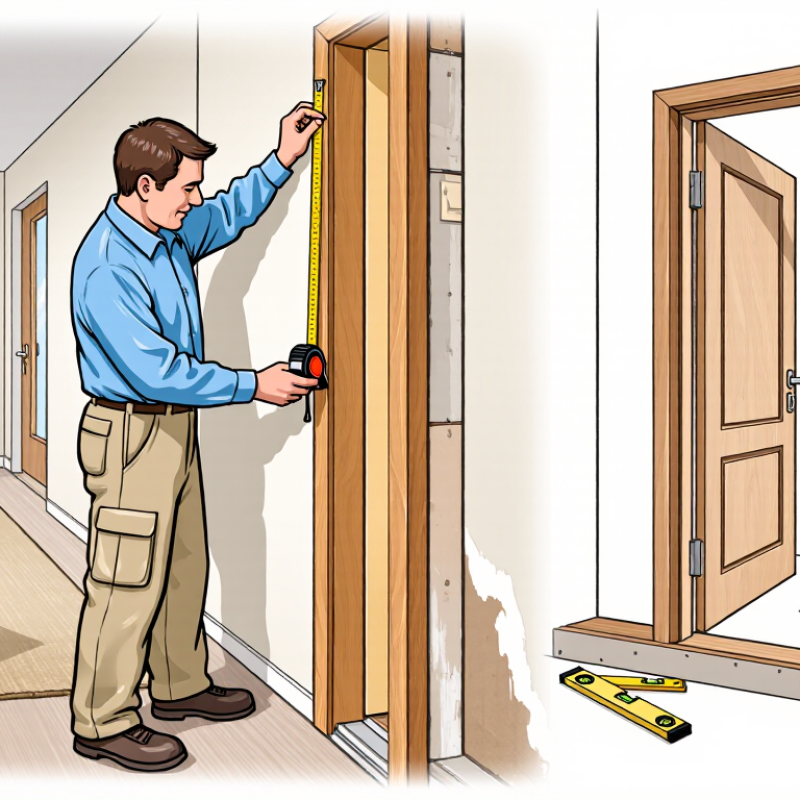
Joinery specialist James Bernard explains, “A reliable door measurement begins with the opening, not the door you hope to install.” This practical view matters because a small error can affect clearances, hinges, handles, and the final appearance. The process should record the width at the top, middle, and bottom. Measure the height on both sides and through the centre. Check the wall thickness, frame depth, floor level, and intended door swing.

Use a rigid tape measure and write each figure immediately. A sketch can prevent confusion later. Note whether the opening includes an existing lining, architrave, threshold, or carpet. Do not assume the smallest measurement is always the correct finished size. The manufacturer or joiner may require fitting allowances, especially where walls are uneven.

Even experienced installers can miss a detail. That is worth admitting. A careful measurement can still need review before production. Compare the dimensions twice, preferably after removing temporary trim or checking the actual floor finish. These simple checks help transform rough site conditions into accurate specifications for made to measure internal doors. The result should be a door that closes cleanly, clears the floor, and looks intentional rather than forced into place.
How to Measure for Made to Measure Internal Doors

Identify the Door Set: Leaf, Frame, Lining, Architrave, and Clear Opening

How to Measure for Made to Measure Internal Doors

Identify the complete door set before taking measurements. The leaf is the moving door panel, while the frame holds it securely. A lining is used where the opening needs a finished internal surround. Architrave is the decorative trim covering the joint between the frame and wall. These parts are not interchangeable, and confusing them can create an expensive fitting problem.

Measure the clear opening, not only the existing door leaf. Record the usable width and height after the frame is installed. Measure width at the top, middle, and bottom, then measure height on both sides and in the centre. Note the wall thickness, floor finish, hinge side, and door swing. Uneven walls are common. A neat-looking opening may still vary by several millimetres. I once measured only the widest point; it was convenient, but not reliable. Made-to-measure work rewards patience.

Tips: Write every measurement in millimetres. Keep the smallest width and height unless a professional advises otherwise. Photograph corners, skirting, and nearby pipes. Allow for carpet, tiles, or future flooring. Check whether the quoted size means the leaf, frame, or full door set. This detail is easy to miss. The clear opening should also suit everyday movement, furniture, and accessibility needs. When the opening is badly out of square, pause before ordering and request an experienced installer’s assessment.

Measure Width at Three Points and Record the Smallest Millimetre Reading

How to Measure for Made to Measure Internal Doors

Measure the opening width at three points: top, middle, and bottom. Use a rigid steel tape, held level between the jambs. Record each measurement in millimetres. The smallest reading controls the door width.

For example, readings of 762 mm, 759 mm, and 761 mm produce a working width of 759 mm.

Do not measure across architraves or skirting. They can hide uneven masonry and create a false result.

This method reflects practical joinery work and the accuracy limits described in ISO 2768-1. Its medium tolerance table allows approximately ±0.8 mm for dimensions from 120 to 400 mm, and ±1.2 mm from 400 to 1,000 mm. That standard is not a door-fitting rule, but it shows why millimetres matter. A 3 mm difference can change the required trimming or clearance. Confirm the final allowance with your door maker, because hinges, floor coverings, and frame conditions affect the fit.

I once measured only at shoulder height. It looked sensible. The bottom was 4 mm narrower. That mistake taught me to measure twice, then check the tape position.

Write the readings beside a quick sketch, including the wall side and hinge side. Photograph the jambs if they twist or bow. A square can reveal problems, but it cannot replace three width readings. Recheck after removing old trim, where possible. Old frames are rarely perfect.

Measure Height at Both Jambs and Centre from the Finished Floor Level

How to Measure for Made to Measure Internal Doors

Accurate height measurements begin at the finished floor level, not the subfloor. The finished floor may include timber, tile, carpet, or another final covering. Place your tape on this completed surface. Measure from the floor to the underside of the frame at the left jamb, right jamb, and centre of the opening. Record every measurement in millimetres.

Small differences matter. A ceiling or lintel can look level while varying by several millimetres. Measure each point twice, keeping the tape straight and vertical. Write down the actual readings, rather than relying on memory. In most cases, the smallest height helps prevent the door from fouling the frame. However, the required clearance depends on the floor finish and installation method. Confirm this before ordering.

Tips: Use a rigid tape and check it against a second tool if possible. Mark the finished floor line clearly with masking tape. Do not measure before flooring is installed unless you can calculate its exact thickness. I once measured from an unfinished screed and had to reconsider the entire allowance. It seemed minor. It was not. If the jambs differ noticeably, photograph the opening and share all three measurements with the joiner. Never “tidy” uneven figures to make them look convenient.

Check Wall Thickness, Squareness, Plumb, and the Common 35 mm Leaf

How to Measure for Made to Measure Internal Doors

Accurate measurements begin with the wall thickness. Measure the opening at the top, middle, and bottom on both sides. Older walls often vary by several millimetres. Record the smallest measurement, rather than trusting one convenient reading. Include plaster, tiles, architraves, or other finished surfaces that will remain around the frame.

Check whether the opening is square by measuring both diagonals. If the figures differ, the frame may need adjustment or packing. Use a spirit level to check each jamb for plumb. A slight lean can affect the closing gap and make the door appear incorrectly sized. Do not measure only the visible face. This is a common mistake, and it can produce an expensive order that still needs trimming.

A 35 mm door leaf is common for internal applications, but it is not universal. Confirm the required leaf thickness with the frame, hinges, latch, and available clearances. Measure the intended height from the finished floor, not from unfinished subflooring. Leave practical clearance beneath the leaf, especially over carpet or thick flooring. On site, dust and uneven edges can make measurements less reliable. Recheck them after preparation. Even careful measurements sometimes need a second look.

Compare Findings with UK Nominal Sizes, Such as 1981 × 762 mm Leaves

How to Measure for Made to Measure Internal Doors

Measure the door leaf, frame, and structural opening separately. The UK nominal reference is often 1981 × 762 mm for a standard internal leaf. BS 4787-1:1980 lists this size among commonly used internal door dimensions. However, nominal size is not the finished opening size. Allow for the frame, stops, hinges, and installation gaps.

Remove the door carefully, then measure height, width, and thickness at several points. Record the smallest measurement, not the largest. A 1981 mm leaf may measure slightly differently after years of paint, trimming, or moisture movement. Measure from the underside of the top edge to the bottom edge. Check width near both ends and through the centre. Write down every result.

The English Housing Survey 2022-23 reports that around one in five homes in England predates 1919. Older properties commonly contain uneven openings and altered frames. This makes direct comparison with 1981 × 762 mm leaves useful, but never sufficient. My first instinct is to order the nearest nominal size. That can be a costly mistake. Compare your findings with 1981 × 762 mm, then assess whether the existing frame is square. Check diagonals too. A difference of only a few millimetres can affect closing, latch alignment, and fire performance. The measured thickness matters as well, because many traditional leaves are not interchangeable with modern 35 mm examples. Record the hinge positions and keep clear photographs. Your notes may reveal an earlier alteration.

How to Measure for Made to Measure Internal Doors - Compare Findings with UK Nominal Sizes, Such as 1981 × 762 mm Leaves

Measurement or reference How to record it Typical UK nominal reference Why it matters for a made-to-measure door
Door leaf width Measure the existing door leaf across the top, middle and bottom. Record the smallest measurement in millimetres. 610, 686, 762 or 838 mm Different readings can indicate a tapered, damaged or altered leaf. The smallest width helps avoid ordering a replacement that is too wide.
Door leaf height Measure from the top edge to the bottom edge at the hinge side, latch side and centre. Record the smallest measurement. 1981 mm is a common nominal height A floor that is not level or a frame that is out of square may produce different height readings.
Door leaf thickness Measure the slab away from hinges, glazing beads and surface mouldings. Do not include handles or projecting hardware. Approximately 35 mm is common for many standard internal leaves; thicker construction is also available. Thickness affects hinge selection, latch alignment, handle position and the fit within the existing frame or lining.
Frame or lining opening width Measure the clear opening between the inside faces of the frame or lining at the top, middle and bottom. No single opening size should be assumed from the nominal leaf size. The frame opening includes fitting clearances and may differ substantially from the door leaf size.
Frame or lining opening height Measure the clear opening from the finished floor or threshold to the underside of the head at the left, centre and right. Confirm on site rather than converting directly from a nominal leaf height. Floor finishes, thresholds and uneven heads can reduce the available height.
Rebate or stop detail Check whether the frame is rebated or has a separate door stop. Measure the rebate depth and width if present. Existing frames vary; do not infer the detail from leaf dimensions alone. The rebate determines the seating position of the leaf and may affect the required edge dimensions.
Hinge positions Measure each hinge position from the top of the leaf to the top and bottom of the hinge, including hinge size and corner shape. Existing layouts are not universally standardised. Accurate hinge locations help the new leaf align with the existing frame without unnecessary alterations.
Latch and handle height Measure from the bottom or top edge of the leaf to the centre of the spindle, latch case or lock case. Use the existing positions when reusing hardware; there is no single universal height for every door. Correct positioning prevents the latch, strike plate and handles from being misaligned.
Door swing and handing Viewed from the side where the hinges are visible, note whether the hinges are on the left or right and which way the door opens. Left-hand and right-hand arrangements depend on the installation. Handing affects hinge preparation, lock preparation and the direction of opening.

Common UK Internal Door Leaf Sizes

Nominal leaf size Approximate imperial equivalent Typical application Comparison note for measured doors
1981 × 610 mm Approximately 78 × 24 in Narrow internal door openings Use the actual leaf measurement to determine whether a nominal 610 mm width is suitable.
1981 × 686 mm Approximately 78 × 27 in Common smaller room or cupboard openings Nominal size describes the leaf, not the complete structural opening.
1981 × 762 mm Approximately 78 × 30 in Very common internal room-door reference A measured replacement may need a slightly different finished size to suit the existing frame and clearances.
1981 × 838 mm Approximately 78 × 33 in Wider internal openings Check the available opening, wall layout and hinge-side clearance before selecting this width.
Custom measured size Recorded in millimetres Altered, historic, non-standard or uneven openings Provide separate finished dimensions for the leaf, thickness, hinge positions, latch preparation and any rebates.
Measurement reminder: Measure in millimetres, take each key dimension at least three times, and record the smallest relevant reading. A nominal size such as 1981 × 762 mm identifies a typical door leaf size; it does not automatically define the frame opening, fitting clearance or final made-to-measure dimensions.