How to Make Freeze Dried Skittles at Home?
Freeze Dried Skittles are a unique treat that combines your favorite candies with a different texture. The freeze-drying process removes moisture while preserving flavor. This method has gained popularity in recent years, with the global freeze-dried food market projected to reach $88.94 billion by 2025, according to industry reports. Such trends highlight the increasing interest in convenient, long-lasting snacks.
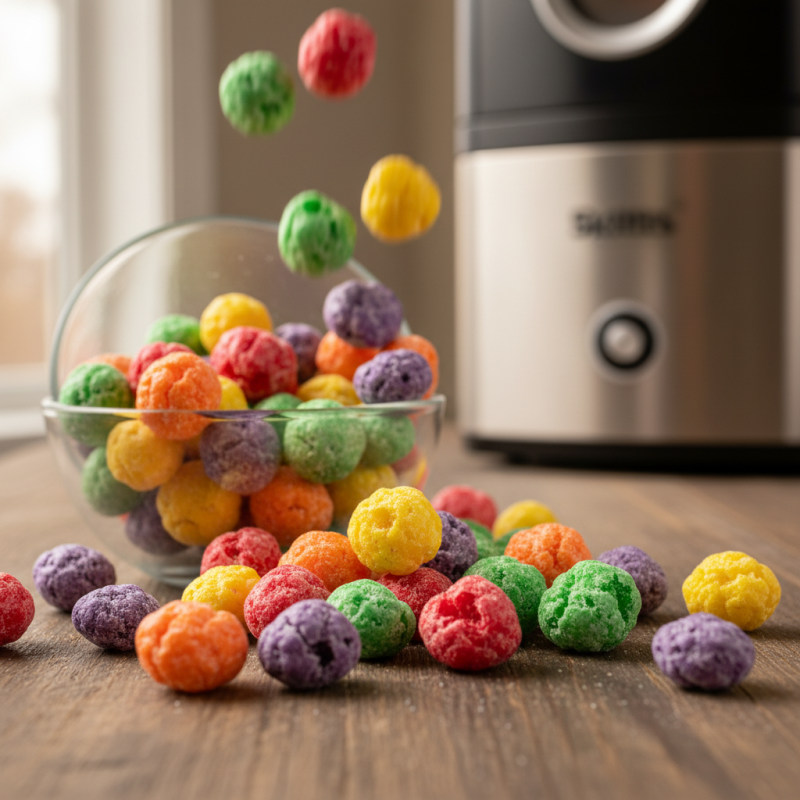
Creating your own Freeze Dried Skittles at home can be rewarding. It offers an opportunity to experiment with flavors and textures that store-bought options can't match. Using a freeze dryer might seem complicated, yet the results can be astonishing. The vibrant colors and tangy sweetness of Skittles become intensified once freeze-dried. Each bite becomes crunchy and light, making them irresistible.
However, achieving the perfect Freeze Dried Skittles may take practice. The process requires precision and understanding of equipment. Some may find the initial attempts less satisfying than expected. Yet, with patience and experimentation, you can discover the ideal technique. Embracing this culinary challenge can lead to delicious rewards.
How Freeze Drying Works: The Science Behind the Process
Freeze drying is a fascinating method that removes moisture from food. The process involves freezing the item and then lowering the pressure. This causes ice to turn into vapor without becoming liquid—a process called sublimation. The result is a lightweight, shelf-stable product. Reports show that freeze-dried foods retain about 97% of their nutrients.
When making freeze dried Skittles at home, ensure your freeze dryer is set properly. Each piece should freeze uniformly. This prevents uneven drying. The moisture content can significantly impact taste and texture. A study from the Food Research Institute revealed that uneven freeze drying can lead to poor quality outcomes, such as hard or chewy textures.
Tips: Cut Skittles in half for quicker drying. This increases the surface area exposed to the vacuum. Additionally, experiment with different freeze dryer temperatures for optimum results. Keep an eye on the process—it often takes longer than expected. After all, learning is part of the fun. Embrace the imperfections that come with trying something new.
Essential Equipment for Making Freeze Dried Skittles at Home
To create freeze-dried Skittles at home, you'll need specific equipment. A food dehydrator is essential. Choose one with settings for temperature and airflow. Another option is a freeze-drying machine. These can be pricey but yield excellent results. Make sure the machine is clean and ready to use.
In addition, a vacuum sealer can help preserve your Skittles after freeze drying. A simple bag might not keep them fresh. You’ll also need containers for the final product. Mason jars work well. They keep air out and are easy to use.
Keep in mind, you'll want to monitor the process closely. It can take up to 24 hours to finish. If it's too humid, results may vary. Not every batch turns out perfect. Experimenting will help you refine your technique. Enjoying the fruits of your labor is always rewarding, even if the first attempt isn't ideal.
How to Make Freeze Dried Skittles at Home? - Essential Equipment for Making Freeze Dried Skittles at Home
| Equipment | Description | Approximate Cost |
| Freeze Dryer | A machine that removes moisture from food through sublimation. | $2000 - $3000 |
| Food Dehydrator | An appliance that removes moisture by circulating hot air. | $50 - $300 |
| Vacuum Sealer | Used to package freeze-dried Skittles for storage. | $30 - $200 |
| Baking Sheet | To place the Skittles under the dehydrator or freeze dryer. | $10 - $30 |
| Airtight Jars | For storing the freeze-dried Skittles to keep them fresh. | $5 - $20 each |
Step-by-Step Process of Freeze Drying Skittles Successfully
Freeze drying Skittles at home can be an exciting project. You’ll need a freeze dryer, which is essential for this process. Without it, achieving the desired texture is nearly impossible. Start by arranging the Skittles in a single layer on the freeze dryer tray. This step is critical; overcrowding can lead to uneven drying.
Once satisfied with the arrangement, set the freeze dryer to the appropriate cycle. This can take anywhere from 24 to 48 hours. Patience is key here. If you rush the cycle, the candies may turn out chewy instead of crunchy. Check back frequently to monitor progress. You may need to adjust your settings if they don’t seem to be drying as expected.
When the process finally completes, inspect the Skittles carefully. They should feel light and airy. However, not every batch may achieve this texture on the first try. Some might still have moisture trapped inside. Consider taking notes on the results. Each attempt provides insights for improvement. Experiment with varying temperatures and drying times. The journey to perfect freeze-dried Skittles is full of trial and error. Enjoy the process!
Nutritional Changes: What Happens to Skittles During Freeze Drying?
Freeze drying transforms many foods, including candies. Skittles undergo significant changes during this process. The water content is removed, altering texture and flavor. They become lighter and crunchier. This new form can be quite different from what you remember.
Nutritional content also shifts. While sugars remain, the removal of moisture concentrates the flavors. You may enjoy a more intense sweetness per piece. Nutrients may be lost, but the treat becomes unique. It's important to consider this before indulging.
Experimenting with freeze-dried candies can be fun. However, results may not be predictable. Some might find the texture less appealing. Others could love the new crunch. Trying new methods often leads to unexpected results. Embrace the outcome, even if it's imperfect.
Nutrition Changes in Skittles Before and After Freeze Drying
Storage Tips for Homemade Freeze Dried Skittles to Maintain Freshness
To maintain the freshness of homemade freeze-dried Skittles, proper storage is crucial. After making your Skittles, let them cool completely before transferring them. Use airtight containers to keep moisture away. Glass jars or vacuum-sealed bags work well. Avoid plastic bags, as they can allow air in.
Keep your stored Skittles in a cool, dark place. A closet or pantry is ideal. Heat and light can degrade flavor and texture over time. It's important to remember that even with the best storage methods, the texture may change after a few weeks. Don't let them sit for too long.
For maximum freshness, consider labeling your containers with the date. This will help you track how long they’ve been stored. If they taste stale, that’s a sign to rethink your storage method. Moisture is the enemy. If you notice any signs of moisture in the container, it’s better to discard them. The goal is to enjoy your homemade treats at their best!